

Studio lighting basics start with a single question: where is the light coming from and what is it doing to the subject’s face? Everything else — modifier choice, power settings, light count, color temperature — is an answer to that question. This guide walks through the foundational concepts and setups most photographers need to produce consistent portraits, headshots, and product shots in a controlled space, without the gear-obsession rabbit hole that delays the actual learning.
TL;DR
- Start with one light and a reflector. Learn direction, distance, and modifier size before adding lights.
- Continuous LED is easier to learn; strobes give more power and freeze motion better.
- Softness comes from modifier size relative to the subject, not from the light itself.
- Three-point lighting (key, fill, rim) is the classical interview and portrait pattern worth mastering.
- Metering with a light meter or histogram beats guessing. Aim for a 3:1 key-to-fill ratio for portraits.
What studio lighting basics actually cover
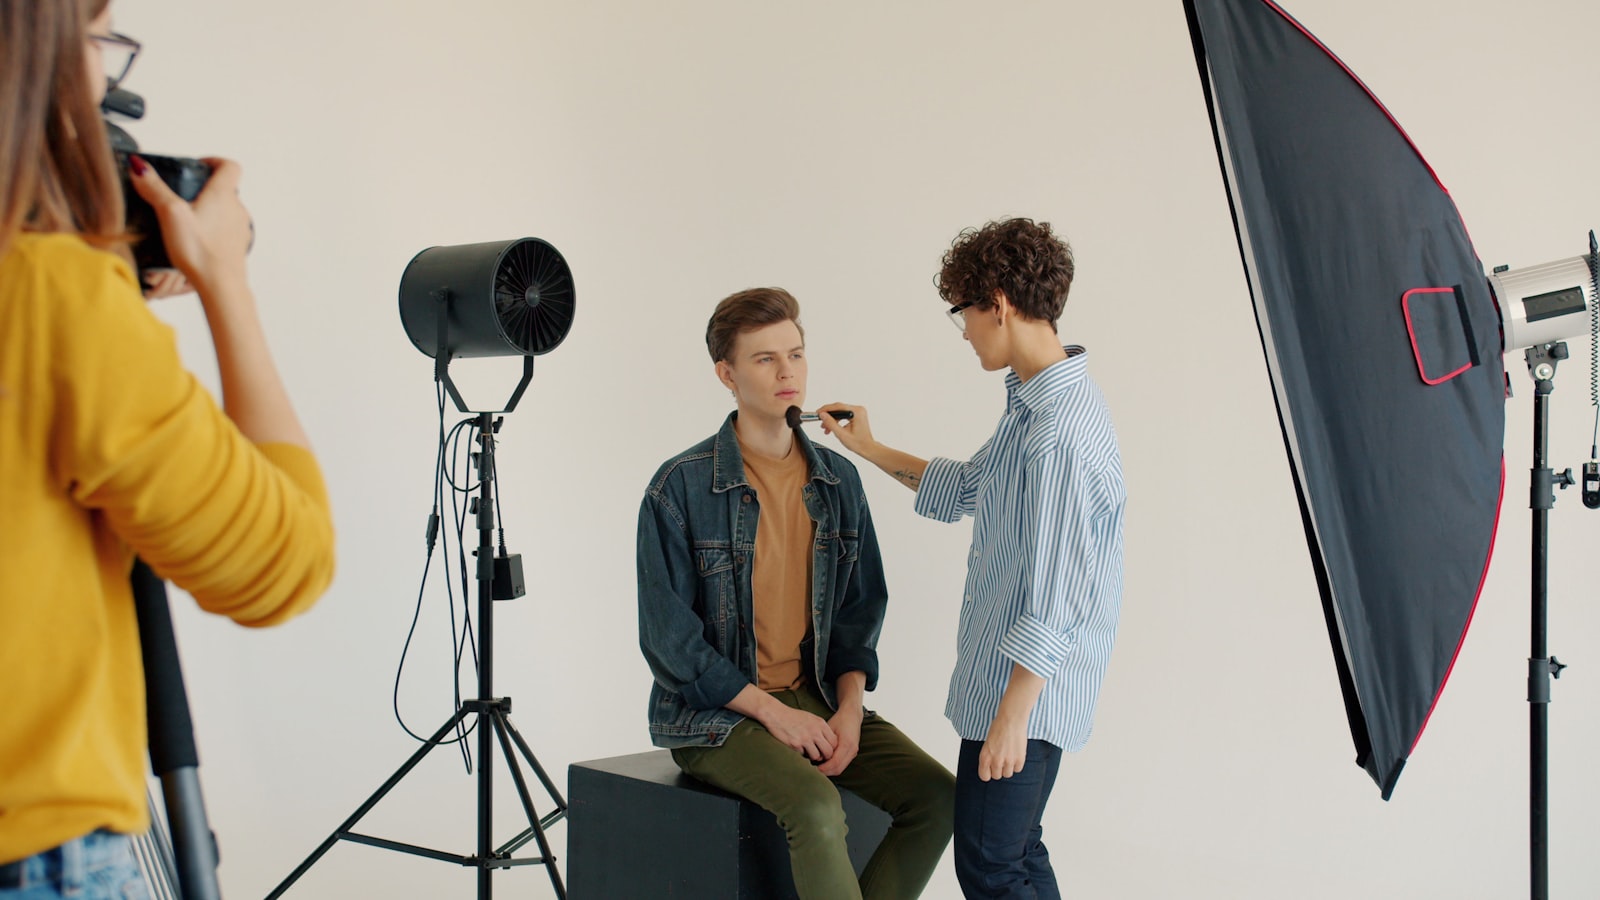
Studio lighting is the craft of building the light you want from scratch instead of reacting to whatever the window or the sun gives you. The fundamentals come down to four decisions made in sequence: where the light is placed (direction), how big it appears from the subject’s point of view (softness), how bright it is relative to other lights (ratio), and what color it is (temperature). Get those four right and the photograph looks intentional.
Most beginner problems trace to one of those four decisions being wrong. Flat-looking portraits come from placing the key light too close to the camera axis. Hot spots on skin come from a modifier that is too small for the subject distance. Muddy shadows come from fill that is too bright relative to the key. Orange-tinted backgrounds come from mixing LED and tungsten sources without correcting color temperature.
Every studio setup you will ever see — beauty-dish portraits, bright catalog product shots, moody editorial photography, bright-and-airy family sessions — is a variation on these four variables. The gear is the mechanism; the four variables are the craft.
Light sources: continuous vs. strobe
Continuous lights stay on. You see exactly what the final frame will look like, which makes them faster to learn and more forgiving. Modern LED panels are bright enough for portraits at low ISO and color-accurate enough for professional work. The downside is power — the brightest LED panels still output less light than a mid-tier strobe, so outdoor overpowering of the sun is limited.
Strobes fire a short, high-power burst when the shutter opens. They freeze motion well, overpower ambient light easily, and put out far more energy than continuous lights for the same price. The trade-off is that you cannot see the result until you take a test shot, which requires a learning curve on metering and triggering.
For hybrid photo-and-video shooters, continuous LED is the practical default in 2026. For portrait and headshot specialists who do not shoot video, mid-tier strobes like the Godox AD200 Pro or Profoto B10 Plus still give better cost-per-watt and better control over motion. You will eventually want both if you shoot professionally, but starting with one type is the right move.
Modifiers and why size matters
A modifier is anything that changes the raw light before it reaches the subject. Softboxes, umbrellas, beauty dishes, grids, and scrims are the common categories. The single rule that matters most: softness is a function of the modifier’s apparent size from the subject’s point of view.
A 90 cm softbox held 50 cm from the face is large and soft. The same softbox pulled five meters back is small and relatively hard. This is why professional headshot photographers often shoot with a huge modifier close in — the wrap-around softness flatters skin and reduces the need for heavy retouching.
A practical starter modifier kit is a 90 or 120 cm octabox or softbox as your key, a white 80 cm reflector for fill, and a small strip box or grid for rim light when you add a second source. Beauty dishes, scrims, and specialty modifiers come later.
The one-light setup that teaches you most
The fastest way to learn studio lighting is to spend a weekend with one light, one modifier, and a reflector. Shoot portraits of the same person while moving only the light — first 45 degrees camera left at eye height, then 45 degrees camera right, then directly overhead, then from below, then behind the subject for backlight. Note what happens to the shadow under the nose, the catchlight in the eyes, and the texture of the skin.
After direction, experiment with distance. Keep the light at 45 degrees but pull it from one meter to three meters. Watch how fall-off changes — close positions give dramatic light on the face with a darker background, farther positions even out the exposure across the frame.
Finally, test modifier size. Swap the 90 cm softbox for an 30 cm softbox at the same distance and shoot the same portrait. The shadows harden, the skin texture shows more, and the mood shifts toward editorial or dramatic. This single exercise covers more useful ground than a dozen YouTube setup videos.

Three-point lighting explained
Three-point lighting is the classical interview and portrait setup: a key light doing the main shaping work, a fill light lifting shadows on the opposite side, and a rim or hair light separating the subject from the background. Almost every polished portrait, interview, and headshot you have seen uses some variation of it.
The key light is typically placed 30 to 45 degrees off the camera axis and slightly above eye level, with the modifier angled down toward the face. This produces a subtle shadow under the nose and chin that gives the face dimensional shape without looking harsh.
The fill sits on the opposite side of the subject, usually at a lower power or farther away so the shadow side of the face is not fully black but is visibly darker than the key side. A 3:1 ratio — the key light is three times brighter than the fill — gives a natural-looking contrast. A 1:1 ratio looks flat and catalog-like; a 5:1 or higher ratio looks moody and editorial.
The rim or hair light sits behind and above the subject, pointing at the back of the head and shoulders. It adds a subtle outline that separates them from the background. On dark backgrounds a rim light is often critical; on bright backgrounds it may be unnecessary.
Common setups and when to use them
The following table summarizes the setups that cover most portrait, headshot, and product work. Use it as a starting point, not a prescription — every face, product, and room rewards slight adjustment.
| Setup | Configuration | Best for |
|---|---|---|
| Clamshell | Key softbox above subject, reflector or second light below pointing up | Beauty, headshot, female portraits; soft even skin |
| Rembrandt | Key at 45 degrees camera-side, above eye level, producing a triangle of light on the shadow cheek | Dramatic portrait, editorial, male portraits with character |
| Butterfly (paramount) | Key directly in front and above the subject, casting a symmetrical shadow under the nose | Classic beauty, fashion, cover-style portraits |
| Three-point | Key at 45 degrees, fill at 45 degrees opposite, rim light behind | Interview, corporate headshot, video podcast |
| High key | Overexposed white background with flat front lighting | Catalog, e-commerce product, bright editorial |
| Low key | Single narrow modifier, dark environment, minimal fill | Moody portrait, cinematic headshot, editorial |
Metering and getting the exposure right
Guessing exposure works until it doesn’t. A light meter takes the ambiguity out — you hold it at the subject’s face, trigger the strobe, and it reads back an f-stop. For continuous light, the camera’s own histogram and exposure preview are usually enough if you shoot in manual mode.
The practical workflow: set ISO low (100 to 400), set shutter speed at your strobe sync limit (usually 1/200s), meter the key light to set your aperture, then add fill until the shadow side sits one to one-and-a-half stops darker. Check the histogram for clipping on highlights (a blown white shirt) and lift the key a touch if needed.

Color temperature and mixing sources
Light has a color, measured in Kelvin. Daylight sits around 5500K, tungsten around 3200K, and older fluorescent bulbs are unpredictable. Mixing two sources at different color temperatures without correcting produces the orange-and-blue split you see in amateur work shot under window light plus a tungsten lamp.
In a studio setting, keep every light at the same Kelvin rating. Most modern LEDs and strobes output around 5500K. If you are shooting indoors and want to blend ambient window light, either block it completely with blackout curtains or gel your strobes to match the color of the ambient.
What to buy first
A realistic starter kit for a beginner photographer: one mid-tier continuous LED or strobe with a 90 cm softbox, a collapsible 80 cm reflector, one light stand, and a trigger for strobes. Expect to spend USD 400 to 800 for a reliable kit, depending on whether you go continuous or strobe. For strobes, the Godox SK400II two-light kit is the benchmark starter; for continuous, the Aputure Amaran 200d hits the same price range with Bowens-mount compatibility. The full breakdown by brand and use case is in the best lighting kits for photographers guide.
Where to go next
Practice matters more than gear. Set up the one-light exercise above, shoot 300 frames of the same subject across the weekend, and review what changed with each lighting position. Then add a second light and build a three-point setup. Once you can produce consistent headshots, branch into product or full-length portraits.
If you are building these skills to offer a service, the headshot photographers directory shows what the commercial market expects, and the how to choose a wedding photographer guide illustrates how lighting skill factors into client-facing decisions.
As an Amazon Associate we earn from qualifying purchases. Some links in this article are affiliate links — they don't cost you anything extra.
🛒 Shop the gear: Browse all lighting gear in our shop →