
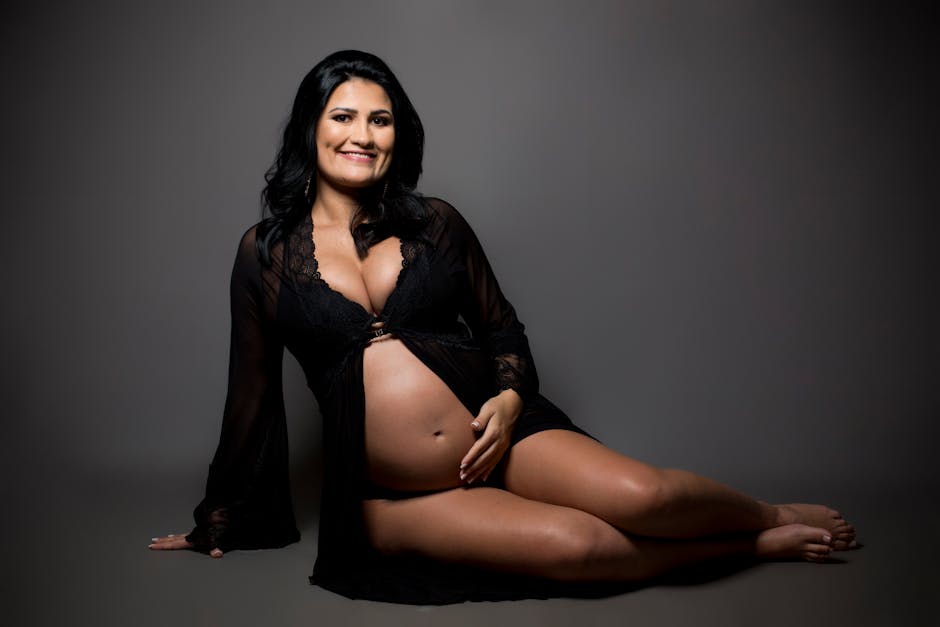
Most first-time maternity clients arrive at the shoot worried they’ll look stiff, forget where to put their hands, or accidentally make the bump look less defined than it feels. Good news: how to pose for maternity photos is mostly the photographer’s job, not yours. But knowing the seven or eight core pose families helps you relax into the session and understand what the photographer is asking for when they say “soft chin down, weight to the back leg.” This guide walks through the posing vocabulary from the client’s side.
TL;DR
- Seven core pose families cover most maternity sessions: standing 3/4, side profile, seated, floor, lying, walking, and partner poses.
- The 3/4 angle (bump slightly toward camera) is the most universally flattering.
- Hand placement defaults: one under the bump, one on top or at the shoulder.
- Weight on the back leg and chin forward-and-down lengthens the body and sharpens the bump shape.
- Alternate standing and seated poses so you never stand for more than 20 minutes straight.
How to pose for maternity photos: core principles
Before the specific poses, five principles apply to almost every frame:
Angle the body slightly. A straight-on frontal stance flattens the bump. A 15 to 30 degree turn toward the camera gives the bump dimension.
Weight on the back leg. Shift your weight to the leg farther from the camera, bend the front knee slightly, and let the hip drop. This creates the soft S-curve photographers cue for.
Chin forward and slightly down. Push the chin slightly toward the camera, then tilt it gently down. This sharpens the jaw line.
Hands do work. Relaxed fingers, slight space between the hand and the body. Pressed-flat hands read tense on camera.
Shoulders down. Roll shoulders up, then drop them. Raised shoulders shorten the neck.
Pose family one: standing 3/4
The workhorse maternity pose. Stand at a 3/4 angle to the camera, weight on the back leg, front knee slightly bent. Hands cradle the bump — one underneath, one resting on top or at the collarbone.
Variations: turn the head further to the camera for a softer portrait; turn the head away and look down for a more introspective frame; drop the upper hand to the side and let it hang for a more casual feel.
This is the pose you’ll see in most maternity gallery covers. It works in studio, outdoors, and at any bump size from week 28 onward.
Pose family two: side profile
Full side profile emphasizes the bump shape — the peak image for “this is what my body looks like at 32 weeks.”
Stand in full profile, back straight, shoulders back and down. Weight even on both feet or slightly on the back leg. Hands: one under the bump, one on the lower back (classic “tired pregnant” pose, but in a good way); or both hands cradling; or one hand lifted to push hair back or touch the face.
Side profile with a strong light source from behind creates a silhouette effect that works particularly well for gowns. Studios in cities with large window light setups — browse examples on New York maternity photographers — often feature a silhouette shot in their portfolio.
Pose family three: seated
Seated poses bring relief to the legs and give the photographer a new set of angles.
Seated on a stool or bench: sit at a slight angle, knees together or crossed at the ankle, hands on or under the bump. Straighten the spine and drop the shoulders.
Seated on a chair with an arm: lean one elbow on the chair arm, turn the opposite shoulder toward the camera, rest the other hand on the bump.
Seated on the floor: legs tucked to one side, one arm supporting the body, the other on the bump. Especially effective for flowy gown looks because the fabric pools around you.
Seated with partner standing behind: you on a stool, partner standing behind with hands on your shoulders or on the bump.
Pose family four: floor and lying
Floor and lying-down poses photograph beautifully but come with comfort rules.
Side-lying: lie on your left side (better blood flow than right), one arm extended up as a pillow or under the head, top arm resting on the bump. Knees slightly bent. Works best on a soft surface — bed, rug, studio mat.
Semi-reclined: prop up on pillows at a 45-degree angle, legs stretched out or slightly bent, hands on the bump. Safer than flat-back lying after week 20.
Avoid flat-on-back: in the second half of pregnancy, flat supine poses can compress the vena cava. Most maternity photographers avoid them entirely.
Lying poses should be short — under five minutes each — and followed by a standing break. If you feel dizzy, tingly, or short of breath, tell the photographer immediately; this is a known pregnancy response to certain positions.
Pose family five: walking and motion
Motion poses are where flowy gowns earn their keep. They read cinematic and timeless.
Walk toward camera: flowing gown, hands lightly on the bump or holding the gown fabric, eyes on the photographer. Slow steps — the photographer will shoot a burst.
Walk away and look back: walk slowly away from the camera, then turn to look over the shoulder. One of the most-shared maternity frames.
Spin or twirl the gown: a gentle spin with the gown in one hand creates fabric movement. Don’t over-spin at week 32+; a half-turn is enough.
Wind-catch: stand still in profile with the gown lifted to let wind or a studio fan catch the fabric. Best for outdoor sessions on a breezy day.
Outdoor walking poses work particularly well in natural settings — for examples of how PNW studios shoot these, see Portland maternity photographers, which handles forest and coast motion poses often.
Pose family six: partner poses
The partner’s job is to be a supportive frame around you.
The embrace from behind: partner stands behind you, arms around the bump, forehead against your temple. Both of you look down at the bump or one of you closes the eyes. Works for almost every couple.
Face-to-face with bump touching: stand face-to-face, partner’s hands on your lower back, your hands on their chest or at their waist. Close eyes and touch foreheads.
Partner kneeling at the bump: partner kneels in front, hands on the bump, head against or kissing the bump. Can be shot in full body or cropped tight.
Side-by-side profile: both face the same direction, partner behind you slightly, one of their hands joining yours on the bump.
Sitting on the floor, partner behind: you sit cross-legged or legs-to-the-side on the floor, partner sits behind with legs out around you, arms wrapped around bump. Intimate and relaxed.
Skip any pose that requires the partner to do something athletic. Lifts, dips, and dramatic holds look awkward and risk injury at this stage.
Pose family seven: with older siblings
If older children are joining the session, simpler poses win.
Kid kissing the bump: child kneels or stands next to you, places a kiss or a cheek on the bump. Works with toddlers through older children.
Family huddle: you, partner, and child(ren) in a loose cluster, all hands touching the bump. Keep it loose — stiff posing with kids never works.
Child held against the bump: if you can still hold a toddler, sit with them in your lap against the bump. If lifting is uncomfortable, skip this and have them stand next to you.
Shoot kids first. Fresh kids photograph well; bored kids don’t.
Hand placement deep-dive
Hand placement is the detail clients ask most about. Defaults:
One under the bump, supporting — fingers slightly spread, not pressed flat. This is the most universally flattering option.
One on top of the bump — hand relaxed, fingers slightly curved, palm resting rather than pressing.
One on the collarbone or at the neck — adds softness to the upper body.
One reaching up to push hair back or adjust — introduces motion.
Avoid: both hands pressed flat against the bump (reads posed), hands clenched into fists, hands hidden behind the bump (bulking the arms), hands at hip level pointing to the bump (over-directing).
Face and expression
The expression that photographs best in maternity work is a soft, slight smile with relaxed eyes. Full teeth smiles tend to look forced in these sessions. “Smize” (smiling with the eyes while the mouth is closed or barely parted) reads warm without feeling performative.
Alternate between looking at the camera, looking down at the bump, and looking off to one side. A good photographer will cue these transitions.
Outfit-specific pose adjustments
Outfits affect which poses work:
Flowy gowns: emphasize motion, walking, and silhouette poses. The fabric is the visual subject alongside the bump.
Fitted bodycon: emphasize still profile and seated poses where the bump shape reads clearly.
Two-piece bump-baring sets: emphasize hands on the exposed bump, side profile, and close-up compositions.
Casual real-clothes: emphasize candid, relaxed poses — hands in pockets, leaning against a wall, laughing with a partner.
For a full outfit breakdown keyed to pose categories, see the maternity outfit ideas guide.
What to tell the photographer upfront
A five-minute conversation at the start of the shoot sets posing up for success. Tell the photographer:
Anything you’re self-conscious about (arms, double chin, stretch marks, swelling) so they can angle away from it. Any physical limitations (back pain, hip pain, restrictions on lying flat). Whether you want bump-baring shots or prefer all covered. Your comfort level with close-up face or intimate partner poses. Whether the gallery is going public or staying private.
A good photographer will adjust posing in real-time based on these notes. A great one will also proactively check in mid-shoot — for example at LA studios listed on Los Angeles maternity photography studios, where client communication is a standard part of the session flow.
A sample posing sequence for a 60-minute session
Minutes 0 to 10: standing 3/4 in outfit one, warming up.
Minutes 10 to 20: seated poses, same outfit, less physical fatigue.
Minutes 20 to 25: outfit change.
Minutes 25 to 40: outfit two, standing profile and motion poses.
Minutes 40 to 45: outfit change and break.
Minutes 45 to 58: outfit three, partner poses and floor poses.
Minutes 58 to 60: final frames, hands-on-bump close-ups.
For broader context on how session length and timing work, see the maternity session timeline.
Closing
Posing is a collaboration. Your job is to arrive rested, know the pose vocabulary roughly, and trust the photographer to cue the specifics. The best maternity images come from sessions where the client feels loose enough to let the photographer lead — and that usually happens once you’ve warmed through the first pose family. For broader portrait planning, the portrait photography hub covers how maternity posing relates to headshot, family, and newborn sessions that often bundle with it.