
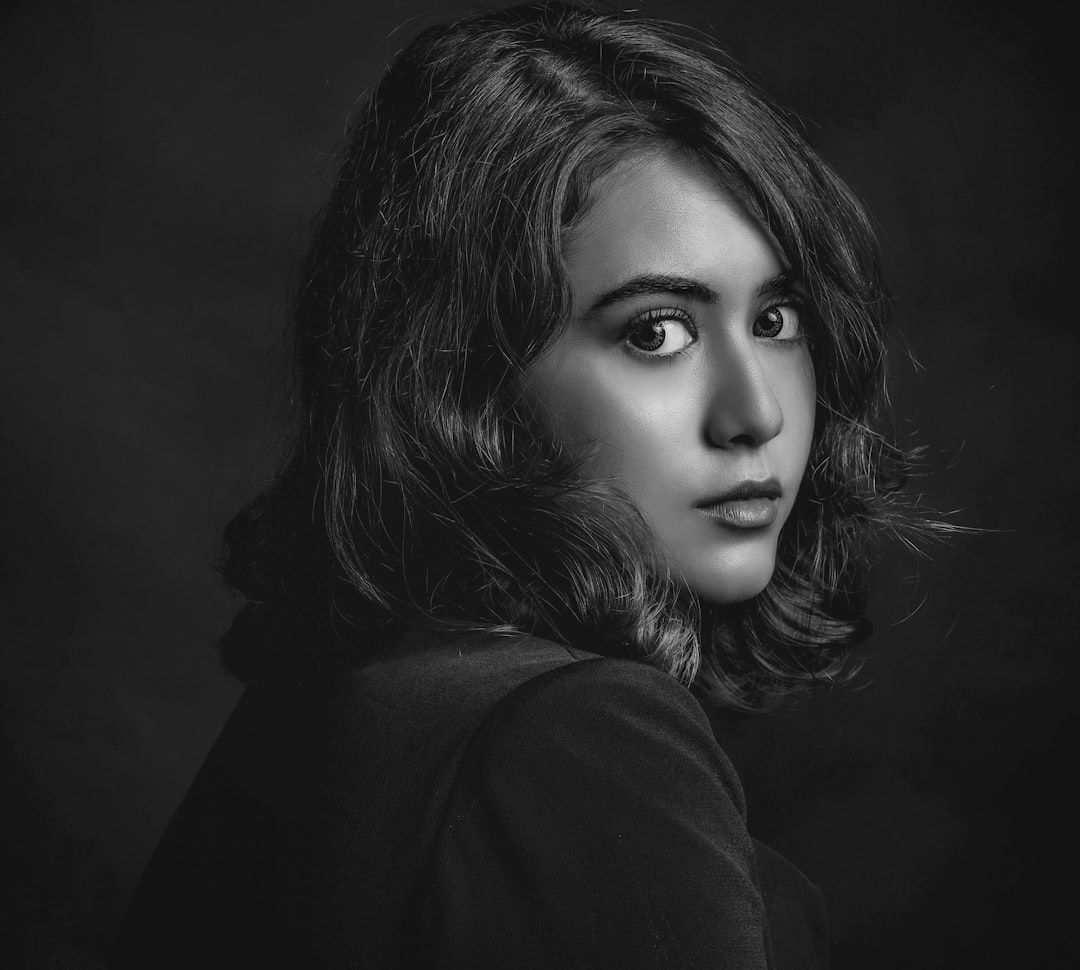
Most business professionals show up to a headshot session, stand straight at the camera, plant both feet, clench their shoulders, and wonder why the final image looks like a driver’s license photo. The difference between a stiff corporate portrait and a headshot that actually helps land meetings is a few precise posing mechanics — chin forward, shoulder tilt, weight shift, relaxed jaw — that nobody ever taught them. This guide breaks down the headshot poses that consistently work for executives, lawyers, founders, and knowledge workers, and shows how to frame the final image for LinkedIn specifically.
TL;DR
- Chin slightly forward and down, not back and up.
- Shoulders angled 15–30 degrees off camera, not squared.
- Weight on the back foot, front foot light — never flat-footed.
- Hands out of the shot unless specifically posed.
- LinkedIn-optimized crop: head and upper shoulders, eyes on the upper third.
Headshot Poses: The Three Mechanics That Do 80% of the Work
Professional headshot poses are really just three small adjustments done consistently: chin position, shoulder angle, and weight distribution. Nail these three and almost any headshot flatters the subject. Miss them and even the best lighting can’t save the frame.
Mechanic 1 — Chin Forward and Slightly Down
The single most counterintuitive adjustment in professional headshots: the chin moves toward the camera, not away from it. Tucking the chin back against the neck (the natural defensive posture) creates a double-chin effect and shortens the jawline.
The correction: the subject extends their chin forward — imagine a turtle poking its head out of a shell — then drops it slightly down. About half an inch of forward movement and a quarter-inch of downward tilt. It feels awkward in the moment and photographs immediately as a more defined jawline.
Photographers call this “chicken-necking” in the studio. It is the number one correction that separates amateur corporate photos from professional ones.
Mechanic 2 — Shoulder Tilt
Squared shoulders facing the camera read like a mugshot. The fix is a small rotation — 15 to 30 degrees off-axis — so one shoulder is closer to the camera than the other.
Which shoulder rotates forward depends on the subject’s better side (most faces have one slightly more symmetrical side) and the hair part, but the rotation itself is non-negotiable for most business headshots. It narrows the torso, adds dimensionality, and signals presence without aggression.
For women, the rotation is often paired with the head turning slightly back toward the camera — shoulders at 20 degrees, face still full-frontal or only 5 degrees turned. For men, shoulders and face can both rotate together for a more grounded, authoritative read.
Mechanic 3 — Weight on the Back Foot
Flat-footed posture reads static and heavy. Shifting the weight onto the back foot — the foot farther from the camera — drops the forward hip, raises the back shoulder slightly, and creates a subtle lean into the camera without actual movement.
This is a posture cue most subjects have never been given. Asking “put 60% of your weight on your back foot” is often the single direction that transforms a stiff frame into an engaged one.
The Posture Foundation
Before any of the three mechanics work, the subject needs to stand well. Most business professionals default to either over-corrected “military” posture (stiff, chest puffed, shoulders locked back) or slump (shoulders forward, chin tucked, head leading). Neither photographs well.
The target posture:
Stand with feet shoulder-width apart, back foot slightly behind the front.
Lengthen the spine — imagine a string pulling the crown of the head toward the ceiling.
Shoulders down and back, not pinched together — away from the ears, not squeezed.
Chest open but not thrust forward.
Weight shifted to the back foot.
Chin extended forward, slightly down.
Jaw relaxed — not clenched, not slack.
Most headshot photographers hub practitioners will walk a subject through this sequence in the first 60 seconds of the session. If they don’t, it’s worth asking.
Hand Placement
For a tight headshot (shoulders and up), hands rarely appear in the frame. For a three-quarter portrait (waist up), hands become part of the composition and need to be managed.
Hand placements that work:
Crossed arms. Reads confident for founders and executives. Does not read approachable for service-industry roles. Hands should rest on the opposite elbow, not clench the bicep.
One hand in a pocket. Reads relaxed. The thumb should be visible outside the pocket — full hand in pocket reads casual, thumb out reads intentional.
Hands on a table or chair back. Reads engaged. Best for environmental executive portraits.
Holding a prop. A notebook, a pen, a coffee cup. Reads authentic if the prop matches the role. A CEO holding a hardcover book reads fine; a CEO holding a coffee cup reads fine; a CEO holding a laptop reads staged.
What to avoid:
Fists at the side (tense).
Hands clasped in front of the crotch (defensive).
Both hands in pockets with thumbs hidden (slouched).
Fingers splayed or pointing at random angles (distracting).
The Expression: Three Microexpressions That Work
Expression is harder to coach than posture, but the three that consistently produce usable headshots:
The “approachable professional.” Soft closed-mouth smile, corners of the mouth turned up, eyes engaged, jaw relaxed. Most common headshot expression. Works for 80% of business roles.
The “authoritative.” Neutral mouth, eyes focused, chin slightly lowered. Works for finance, law, executive leadership. Should still have a softness in the eyes — pure deadpan reads intimidating, not authoritative.
The “warm open smile.” Teeth showing, genuine laugh-adjacent expression. Works for sales, coaching, service industries, creative founders. The key: it should be a real smile, not a held pose smile. Photographers coach into this with prompts like “think of something that made you laugh this week.”
The common failure mode is “held smile” — the subject maintains a smile for too long and the corners of the eyes go dead. A genuine smile engages the orbicularis oculi muscles around the eyes; a held smile doesn’t. Photographers counter this with short bursts: smile, reset, smile, reset, rather than holding a single expression for minutes.
The Eyes
Eyes make or break a headshot. A frame with tight posture and a warm smile but dead eyes reads flat. A frame with slightly relaxed posture and alive eyes reads compelling.
How to get alive eyes:
Focus point — the subject should look at the photographer’s eye, not the camera lens. The lens is a glass disc. The photographer’s eye is a human to connect with.
Blink reset — right before the shot, a full deliberate blink resets the eyes and sharpens focus.
Breath — a small inhale through the nose right before the shot opens the eyes slightly.
Avoid prolonged holding — the longer a subject holds a gaze, the more the eyes glaze over.
LinkedIn-Optimized Framing
LinkedIn displays headshots in a circular crop at very small sizes — profile photos, search results, comment avatars. A headshot that looks great at full-frame might look cramped or off-center in the circle crop.
The LinkedIn-optimized composition:
Crop. Top of the head at the top edge of the frame, shoulders at or just below the bottom edge. Leave about 10% of whitespace above the head so the circle crop doesn’t cut the hair.
Eye position. Eyes on the upper third of the frame, not dead center. This follows the rule of thirds and places the eyes at the visual anchor point of the circle crop.
Background. Simple, low-contrast. A plain neutral wall, a soft-blurred office background, a solid color. Busy backgrounds compete at small sizes.
Color. One point of color contrast between the subject and the background. A navy blazer against a cream wall, a rust sweater against a gray backdrop. Pure black-on-black or pure white-on-white loses edge definition at thumbnail sizes.
Orientation. Vertical or square. Horizontal headshots crop awkwardly into LinkedIn’s square display.
Photographers who specialize in LinkedIn work — common in tech-heavy cities served by San Francisco headshot photographers — often deliver an explicit “LinkedIn crop” alongside the standard edit.
Pose Variations by Industry
Different roles require different read. The pose should match the audience’s expectations for the industry.
Finance, law, consulting. Authoritative. Neutral or soft-closed smile. Shoulder rotation at 15–20 degrees. Chin level to slightly down. Arms at sides or one hand in pocket. Background: neutral, often a window-lit office.
Tech founders, product leaders. Approachable but confident. Soft open smile. Shoulder rotation at 20–30 degrees. Often arms crossed or holding a notebook. Background: often environmental — bookshelf, window, open-office blur.
Sales, account management, business development. Warm, open. Full smile, eyes engaged. Shoulder rotation at 25–30 degrees. Hands visible — one in pocket, one gesturing slightly. Background: often a simple neutral with soft lighting.
Creative professionals (designers, writers, agency leaders). Relaxed confidence. Softer smile or half-smile. Shoulder rotation at 30+ degrees. Looser posture, possibly seated. Background: more permissive — textured wall, studio, environmental.
Medical, academic, scientific. Credible and approachable. Closed-lip smile. Shoulder rotation at 15–25 degrees. Often holding a prop related to the role — stethoscope for physicians, a book for academics.
Nonprofit, advocacy, community leadership. Warm, engaged. Full smile common. Often environmental portraits in the community or workspace. Less formal than finance but still polished.
Seated Headshots
Seated headshots are underused and often more flattering than standing ones, especially for subjects who feel stiff standing.
The rules for seated:
Sit on the front two-thirds of the chair, not the back.
Both feet flat on the floor or one foot slightly behind the other.
Lean slightly forward from the hips — not the waist, not the shoulders. A hip-forward lean reads engaged; a shoulder-forward lean reads slumped.
Arms can rest on the chair arms or a table, depending on composition.
Chin forward, shoulder tilt, same mechanics as standing.
Seated frames are especially good for anyone over 50, anyone uncomfortable with full-length posture, or anyone whose role calls for a “boardroom” feel. Most New York headshot photographers working with finance and law clients default to seated for a reason — it photographs as grounded authority.
Glasses and Jewelry
Glasses need to be managed in the lighting, not the pose, but they affect the pose slightly: the chin may need to tilt down a touch more than usual to kill lens reflections. The photographer should check for reflections in the test frames — if the glasses are reflecting the softbox, the chin adjustment fixes it 80% of the time.
Jewelry should be minimal. A wedding ring, a simple watch, small studs. Large statement necklaces pull the eye away from the face. Chunky bracelets dominate three-quarter crops.
Anyone whose role involves professional styling — broadcast personalities, executives in client-facing roles — should follow the jewelry rules more strictly than anyone whose role is internal-facing.
Quick-Reference Pose Table
| Role | Expression | Shoulder Rotation | Typical Crop |
|---|---|---|---|
| Executive / finance | Soft closed smile | 15–20 degrees | Head + shoulders |
| Tech founder | Warm closed smile | 20–30 degrees | Head + shoulders or 3/4 |
| Sales / BD | Full open smile | 25–30 degrees | Head + shoulders |
| Creative / agency | Half-smile | 30+ degrees | 3/4 body |
| Medical / academic | Closed-lip smile | 15–25 degrees | Head + shoulders |
| LinkedIn general | Soft closed smile | 20 degrees | Tight head + shoulders |
Common Mistakes — The Shortlist
The issues that show up most often in re-shoot requests:
Chin pulled back instead of forward. The number-one mistake.
Squared shoulders facing the camera directly.
Flat-footed posture with weight centered.
Held smile that kills the eyes.
Fists clenched at the sides.
Hands clasped at the front of the body.
Looking at the lens instead of the photographer.
Wearing too many pieces of jewelry.
Standing too far from the backdrop (creates background shadow lines).
Choosing a smile that doesn’t engage the eyes.
The Role of the Photographer
Even with all these mechanics, the subject can’t self-coach effectively. The photographer’s job is to watch for the 1% deviations — a shoulder dropping, a chin tucking, a smile fading — and correct them in real time. A 30-minute session with active posing direction will produce a better gallery than a 90-minute session where the subject is left to figure it out.
This is why industry experience matters more than raw gear. A photographer who has shot 500 corporate sessions has internalized the posing library. A generalist shooting their tenth corporate session will miss corrections that a specialist catches automatically. The corporate headshot guide covers how to vet for this specifically.
Before the Session
Posing only works if the subject shows up rested, hydrated, and properly dressed. Sleep, water, outfits, and a morning-of routine all affect how the face reads on camera. The full headshot session preparation guide covers the preparation side; this guide covers the in-session side. Together they’re the full picture.
Closing
The gap between a passable headshot and a great one is not equipment, lighting, or location. It’s a few small mechanical adjustments — chin, shoulder, weight, expression, eyes — repeated consistently through a 30-minute session. Professional headshot poses are learnable. A photographer who coaches well makes them feel automatic within the first ten frames.